
Hexagonal Map Editor
In order to create an interesting adventure, it is not enough to prepare just a set of unrelated locations, cities and caves. Gamemasters create whole worlds for their players to exist in. We have already learnt how to create maps of events and locations using the RPG Map Editor but what will help to create a game world where all these locations are to be found and where dragons live?
We have a suitable application to help you — Hex Map Editor. Using this utility you will be able to create fantasy or futuristic worlds — anything your imagination may lead you to. As with the RPG Map Editor, we adhered to the following principles:
- Scalability
- our maps should be able to increase in size without any image quality loss. No blurred pictures are allowed, everything should be clear.
- Customization capability
- users should be able to adjust the controls so that it could be easy for them to use the editor.
- Icon creation
- it is important for gamemasters to be able to create the missing icons themselves and for the process not to be too complicated. Having learnt how to use the RPG icon editor literally in 40 minutes anyone can create icons to be used not only for RPG maps but anywhere.
- Multiple levels
- we have always been fond of HOMM3 maps, so we wanted to add similar underground levels to our map, but we also decided to go further, higher than clouds.
- Easy and intuitive interface
- the program should be easy to use and at the same time have a wide range of various functions. We use a universal approach in our interfaces so that everything is standardized.
- Different skill levels
- with our product any user can draw a map right away, but having learnt the hex RPG map editor capabilities or the capabilities of other programs from our ecosystem one can create maps on an absolutely different level.
- One should feel the height
- we have always wanted to reproduce the effect of height in hex maps somehow and we think we have succeeded in some way.
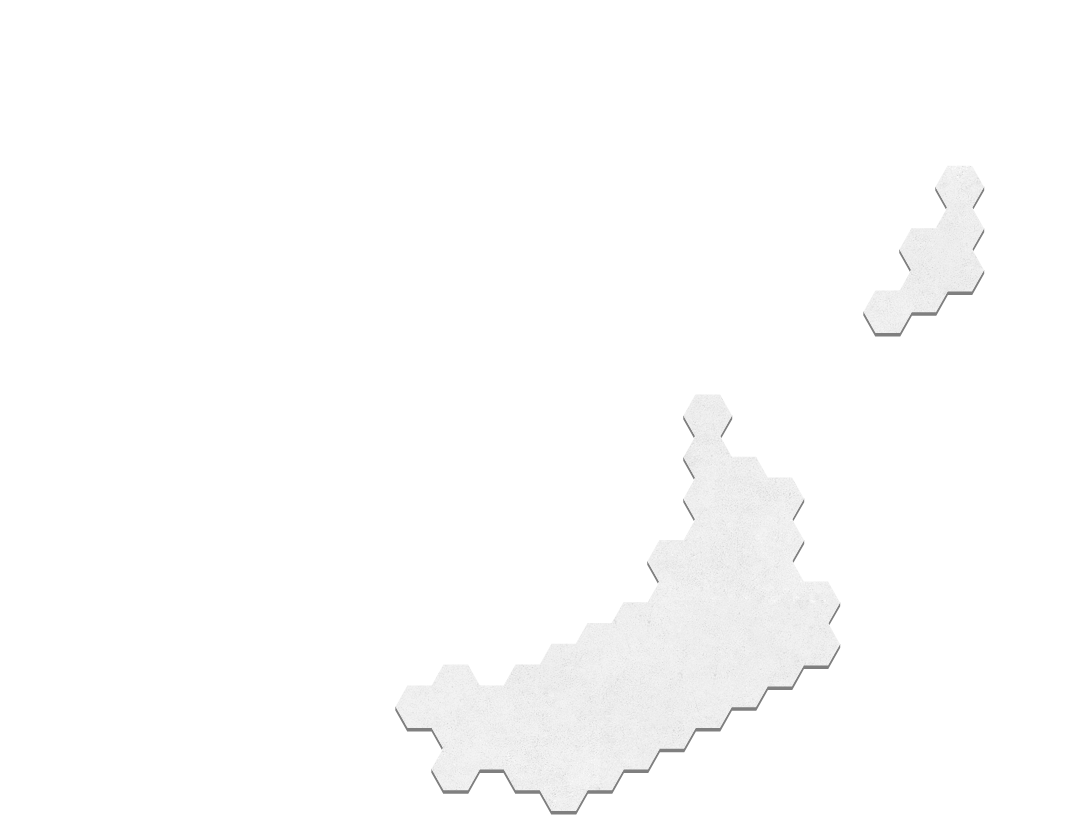
- Hex Map
- we love hexes as it is a very convenient geometrical shape and we want to use it for building mas.
Interface overview
While designing the editor interface we tried to make it as simple as possible. It may be divided into key areas: main window, right panel, subprogram panel, central panel.
Main window — it is a basic object of our program, you interact with a map here. In the object transfer mode, you use the mouse to paint the areas with a brush or frame. In the text manipulation mode manipulators appear in this area to control the behavior of the curve for the text to be displayed properly. It is worth mentioning that the canvas has a horizontal and vertical scroll bars appearing when there is not enough space for the map on the screen (scroll bars appear automatically), so you can use all familiar scrolling features of the mouse and laptop trackpad.
Subprogram panel — this panel contains links to the applications for hex map content generation, for example:
- Text editor
- creating text styles
- Road editor
- creating road styles to be applied to a hex map
- Texture editor
- creating user textures or loading existing textures to the server
- Texture transition editor
- a system for creating templates of one texture transitioning to another texture
- Icon editor
- a program for creating RPG icons for your maps
- Application settings
- a link to the section containing hex map editor settings in the RPGInferno setup application
- Right panel hide button
- sometimes you need to temporarily hide the right panel
Central panel — a multifunctional panel above the canvas containing different controls:

- Scaling slider
- using this feature you can decrease the map size to view the overall results of your work.
- Level switch
- use it to create an underground or sky level.
- Link to our Discord server
- in case you would like to communicate or discuss our map editor in Discord.
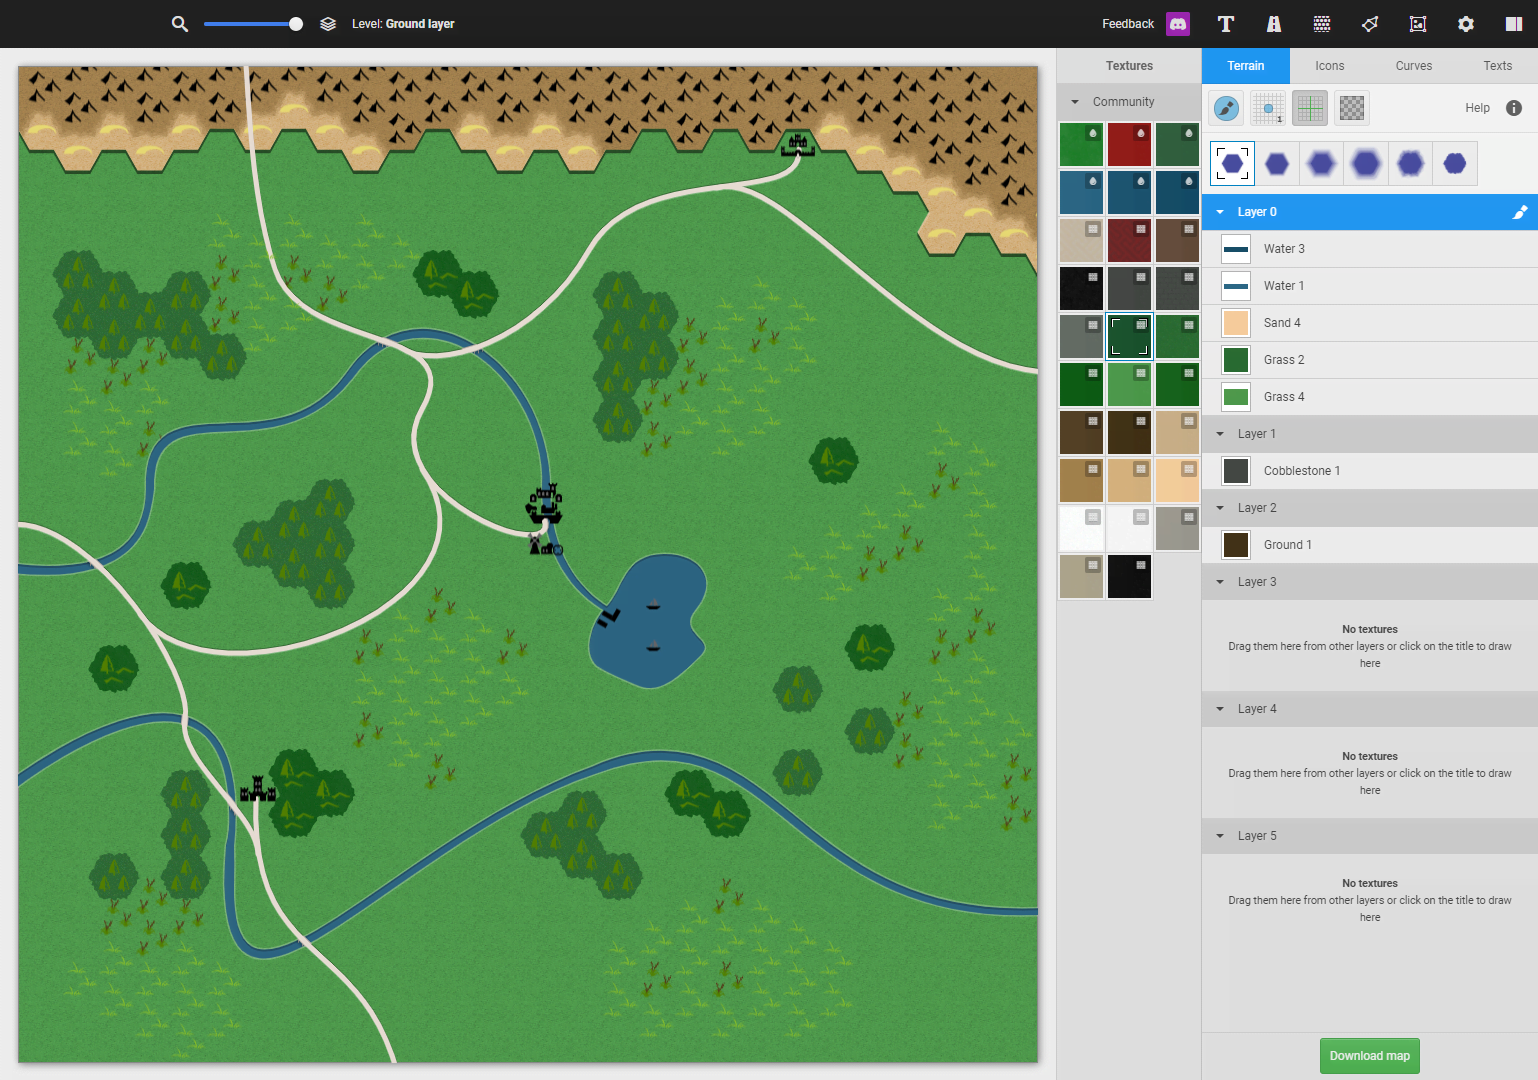
Right panel — a core of the editor where all editor functions concentrate. The panel is divided into 5 key segments:
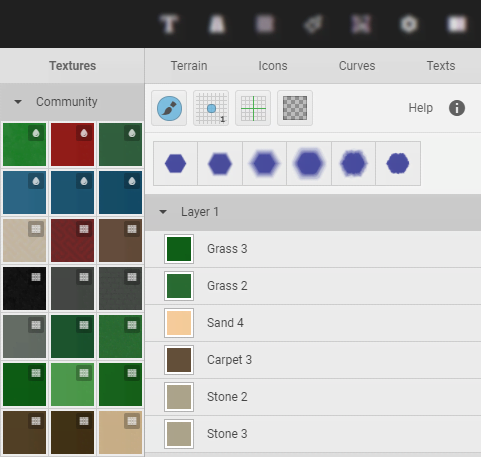
- Bookmarks — reflect the logical division into different asset types to be used for a map: Surfaces, Icons, Curves and Text. Each section may have its own special functions.
- Toolbar — this panel contains the main controls associated with brushes or other map correction parameters. Depending on the section, the area content may change but there is a set of elements which are always available more often than others:
-
- Multifunctional brush
- this button switches between the paint and erase modes.
- Brush size
- you may choose one of the four brush options in the drop-out list.
- Grid on/off
- a grid is useful for editing the RPG world map but sometimes it is necessary to see the map without the grid to understand how it will look like in its final form.
- Grid color
- a special utility for choosing the color of the grid that is overlaid onto the map in case you have drawn Neo Tokyo and you desperately need a violet grid over the map or it may also have to be semitransparent.
- Help icon
- in case you meet an obscure hint in the editor hover over this icon and a quick reference will appear, for example explaining the hotkeys.
- Other elements
- elements to appear within specific sections. They will be described in the corresponding sections of this manual.
- Texture transition editor — a special horizontal area where schemes of one texture transitioning into another texture appear. As opposed to the RPG map editor, this panel is used in the hex editor for transitions only.
- Main content panel — under the variation panel the main content of the selected section may be found: used textures, icon list, added roads, lakes and created text.
- Additional right panel — this control appears when you need to choose a color scheme for the selected element: object/icon color scheme, text template or texture.
Let’s examine each of the four sections in detail.
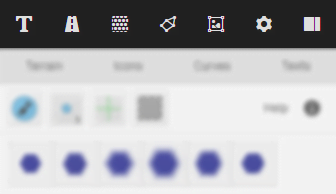
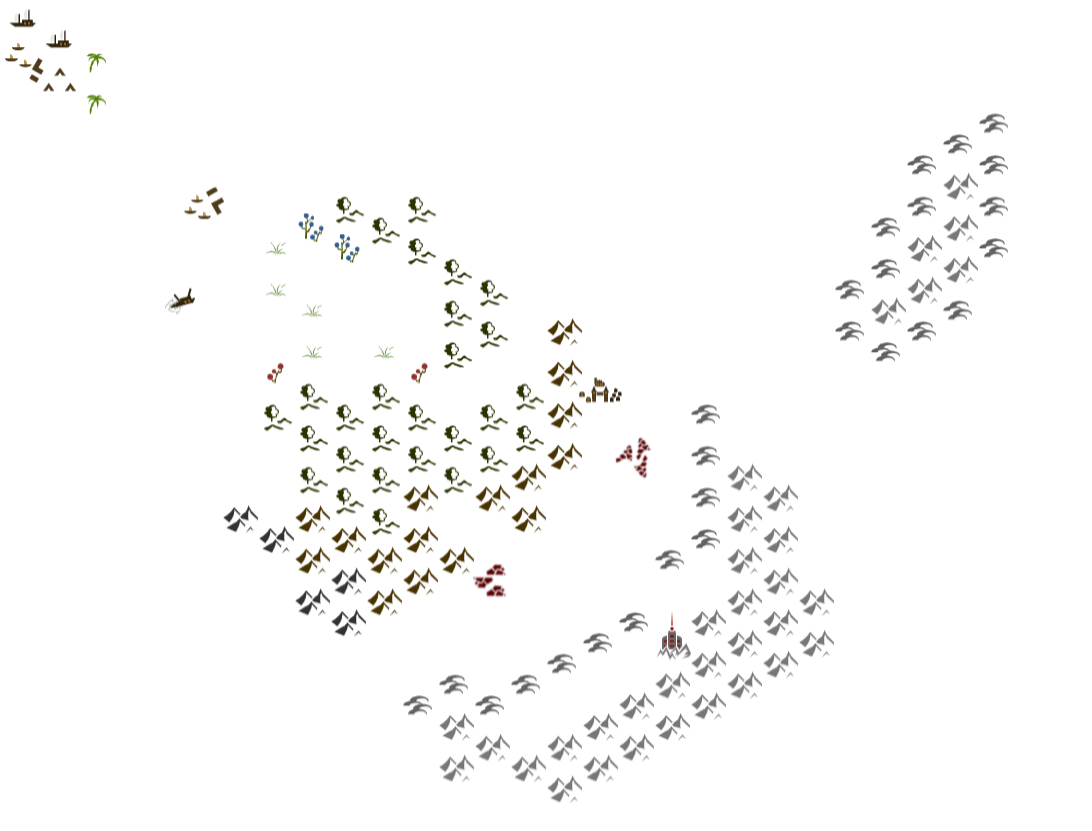
Surface editing
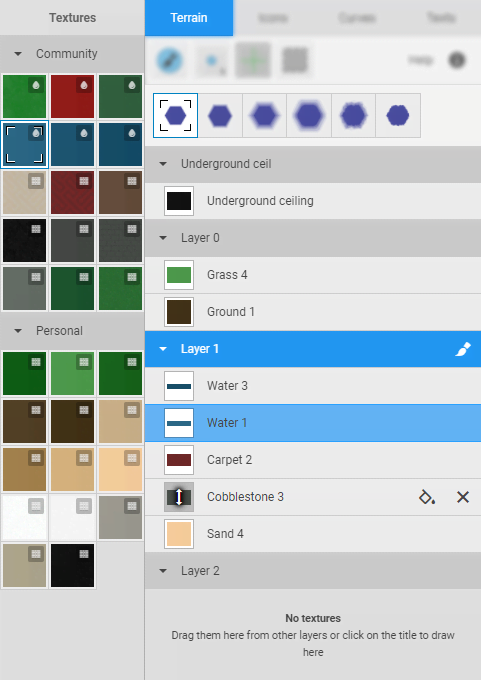
To switch to this mode, you need to choose the ‘Surface’ bookmark. Textures are created with the help of the RPG texture creation application. Different solutions have been developed for working with textures to achieve interesting and beautiful results. In some editors due to the water textures positioning one may observe a funny effect of water rising above the surface instead of the surface submerging. It is unacceptable for us.
After having selected the transition you need to choose a layer to draw on. Layers can be found on the main content panel. When a layer is activated the title is highlighted with a color and a brush appears in the right corner. It is worth mentioning that the textures are unique within the texture layer and you cannot draw two identical tufts of grass. In this case all identical textures will be merged into a single entry.
Please note that underground maps have a special layer — it is a ceiling which has the largest wall height.
Textures may be reassorted within one layer so you may adjust the texture layering. Please remember that the water is always placed under the firm ground so our map editor will not allow to mix water and ground in free combinations.
You may transfer the existing textures between the layers; please note that if a new layer already contains the texture being transferred the data will be combined.
When you hover over the texture in the layer list in the main canvas the texture is highlighted. It helps to identify which map areas are painted with this texture within the selected layer.
When you tap the texture in the layer list you will automatically paint with this texture within the layer containing this texture.
When you hover over the texture in the layer list you will see additional texture controls:
- Flood filling
- double-clicking this button fills the specified texture with your selection from the texture palette.
- Removal
- double-clicking removes the texture from the specified layer.
After the layer has been selected a palette of available textures will appear in an additional panel. The textures are divided into standard groups — community, subscriptions, user-defined. Additionally, each texture has an icon indicating the texture type: water, ground and sky.
Icon editing
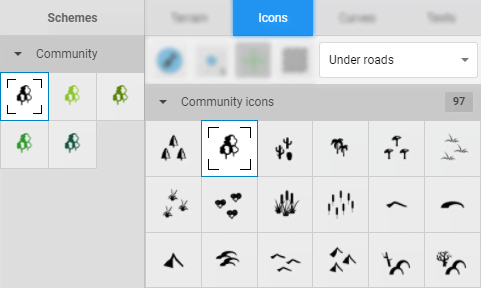
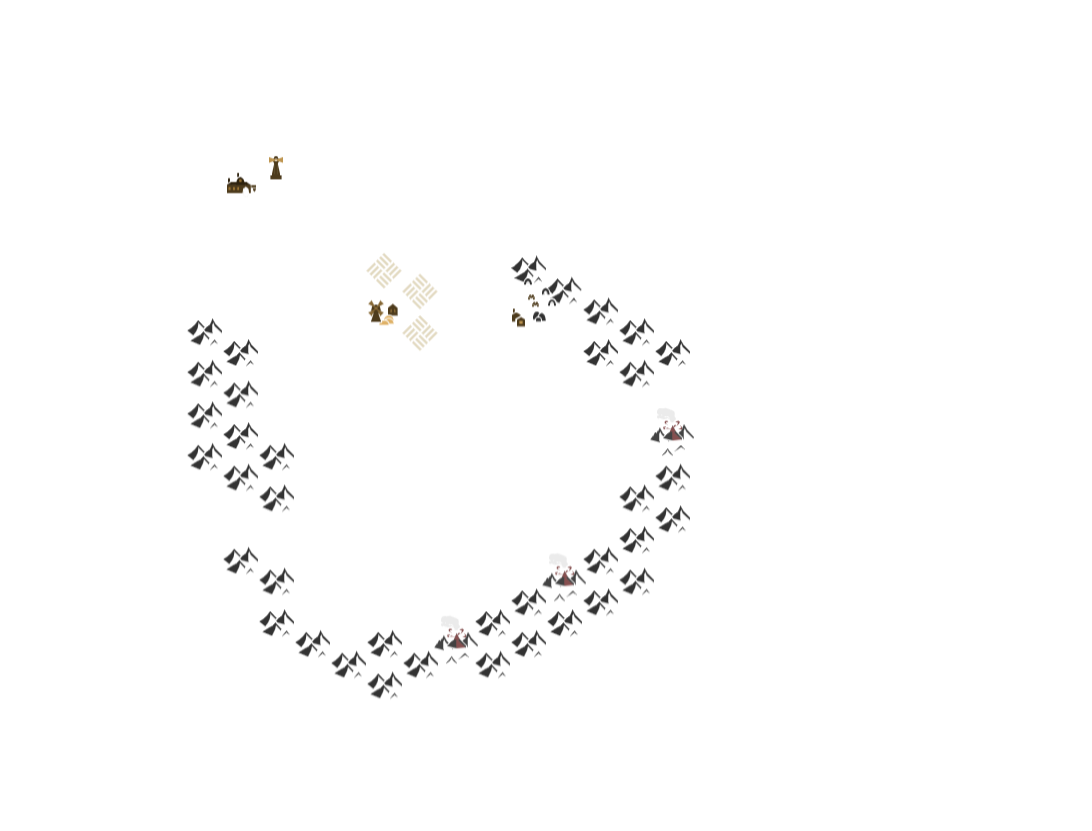
To switch to this mode, you need to choose the ‘Icons’ bookmark. Icons are created in a special RPG icon editor. It is worth mentioning that icons may occupy up to 7 hexes. It provides the opportunity to create large areas covered with urban objects or compound objects, for example, a valley with a secluded pond where a magic swan is swimming.
When activating the ‘Icons’ mode an additional layer selector will appear on the toolbar. The icon will belong to this selector. It allows to place icons both under and above the curves. For example, the grass icons should cover the river surface and the ship images should be above the river or lake.
The main content panel is filled with the list of icons divided into categories: community icons, your icons and icons you subscribed to. Each category may be hidden and some categories even may be removed using the setup section. You may also choose the sections to be expanded by default. Please refer to the setup application page for more information.
When choosing the icon an additional panel with icon-specific color presets will appear. Presets are grouped in the same way as icons. Please remember that you may add your own icon color schemes visible only to you in case the icon does not belong to you.
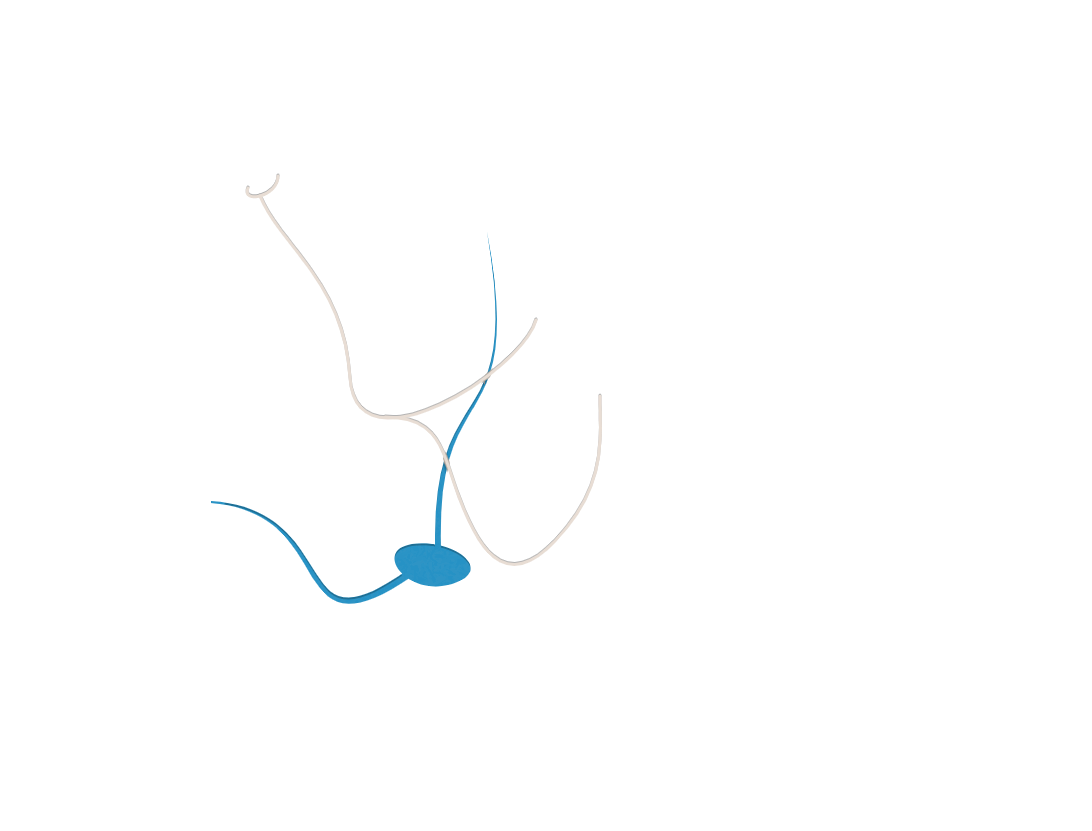
Curve editing
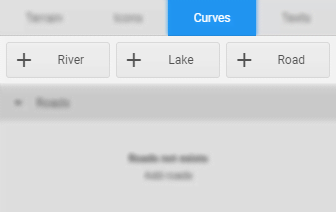
To edit curves, you need to activate the ‘Curves’ bookmark. After activating this mode, you will notice that the toolbar contains only three buttons: for rivers, lakes and roads.
This application is based on curve editing system but as opposed to the RPG map editor in this case curves are composite — they may consist of the unlimited number of parts and as a result additional functions may be available.
Pressing any button will switch the system to the corresponding object adding mode, then you just move the mouse pointer to the canvas, set the object to the required place and continue the correction.
A set of common controls is available for correction: direct highlighting buttons, a point adding button, a curve removal button, a curve linking button, a name entry field.
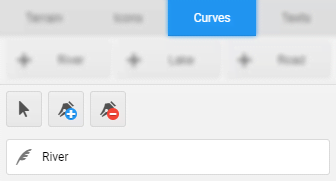
- Direct highlighting
- in this mode you may select curve points as well as curve lines. To select a point just click on one of the square points. To select a line hover over the curve and you will see an assistant line you may click on.
- Point adding
- to add points you may just click on the canvas and a point will be added at the end of the curve. Alternatively, you may hover the mouse pointer over the specific curve segment and a point will be added to the particular place on the curve so that the curve shape will remain unchanged.
- Curve removal
- after selecting this mode you need to hover the mouse pointer over the curve and click on the curve segment for its removal.
- Name entry
- you may enter the name of the road, river or lake to distinguish between them in the control interface.

- Curve linking
- after selecting the particular point connecting two curve parts you will see a chain. When it is active the control points related to this point will be interconnected so that you could blend one curve with another one smoothly.

- Curve type changing
- it is presented in the form of 3 buttons, by clicking on which you can choose along which line the curve will be drawn: line, quadratic curve, cubic curve
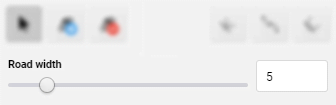
- Road width
- this slider is available when you edit the road.
- River segment width
- when selecting the curve point you will be able to edit the river width in the corresponding place.
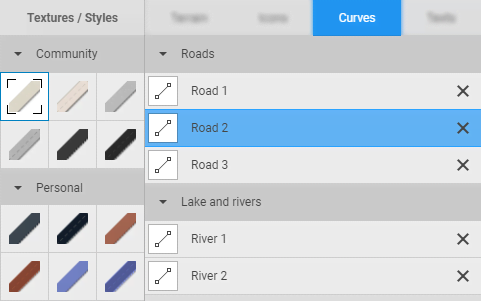
In the main content area all roads, rivers or lakes present on the map are listed. In the main content area all roads, rivers or lakes present on the map are listed.
Double-clicking the cross will delete the curve entry (permanently).
When the editing mode of a particular curve is activated an additional panel contains a list of all available color schemes for roads or a list of fluid textures for rivers and lakes divided into groups. The scheme or texture being used for the curve at the moment is also marked.
During curve editing a special frame appears around the text on the main canvas. Using this control, you may move the curve within the canvas by holding and dragging the frame. When the mouse button is released the new curve position is saved.
There are two types of manipulators for the curve:
- Point manipulator
- looks like a square. If the square has diagonal lines it means the point is either the beginning or end of the curve. To change the point position just hold and drag the manipulator. It is worth mentioning that connecting the beginning and end of the curve will loop it — this is applicable to roads and rivers. If a river is selected, activating the point will allow to adjust the river width at this point so you may change the river width in different parts of the river.
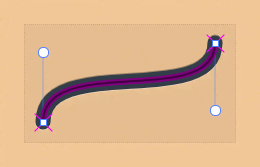
- Curvature manipulator
- if you have selected a quadratic or cubic curve, additional circular-shaped manipulators will appear. They will be connected with the parent point manipulators by half lines. By moving the curvature points you will change the tangent lines of Bezier curves and modify the curve depth.
Text editing
To switch to this mode, you need to click on the ‘Text’ bookmark. This application is based on a special curve ant text management subsystem, so the control elements in this section are unique and do not match the control elements described in the previous three sections.
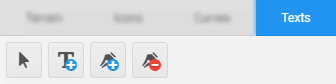
The first thing you will notice while switching to this mode is that there are only 2 buttons left on the toolbar: for direct highlighting and for text adding.
- Direct highlighting
- the mode allows to control the text manipulators. This feature will be described below.
- Text adding
- after clicking on this button you need to move the mouse cursor to the canvas where you will see a preliminary template (“text”) which may be added to the map by left-clicking. After adding the text, you will automatically switch to its editing mode.
- Point adding
- to add points you may just click on the canvas and a point will be added at the end of the curve. Alternatively, you may hover the mouse pointer over the specific curve segment and a point will be added to the particular place on the curve so that the curve shape will remain unchanged.
- Curve removal
- after selecting this mode you need to hover the mouse pointer over the curve and click on the curve segment for its removal.
In the text editing mode, the direct highlighting function will be enabled automatically but you can always click on “Add text” to add a new text. Additionally, you will notice new control elements on the toolbar:

- Curve linking
- after selecting the particular point connecting two curve parts you will see a chain. When it is active the control points related to this point will be interconnected so that you could blend one curve with another one smoothly.

- Curve type change
- represented by 3 buttons allowing to choose the line for the curve to be drawn along: straight line, quadratic curve, cubic curve
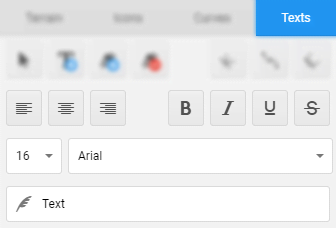
- Text alignment
- ith the help of 3 buttons you may choose the text alignment type: left, center, right. Please remember that once you flip the curve the text will also flip.
- Text formatting
- there are 4 text modifiers available: bold, italic, underlined,
strike throughAll 4 modifiers may be applied simultaneously.
- Font size
- selecting the size from the font size list. If a new size is required please write to us in Discord and we will consider your proposal.
- Font style
- the list of fonts which may be applied to the text. Additional styles are added upon a user’s request through Discord.
- Text editing field
- by entering a text into this field you change the text both on the canvas and in the database, no clicking on additional Save buttons is required.
These are the main things you need to know for managing the map. The next step is to consider the specific features of our layer system and make a detailed list of available objects to use when creating an RPG map.
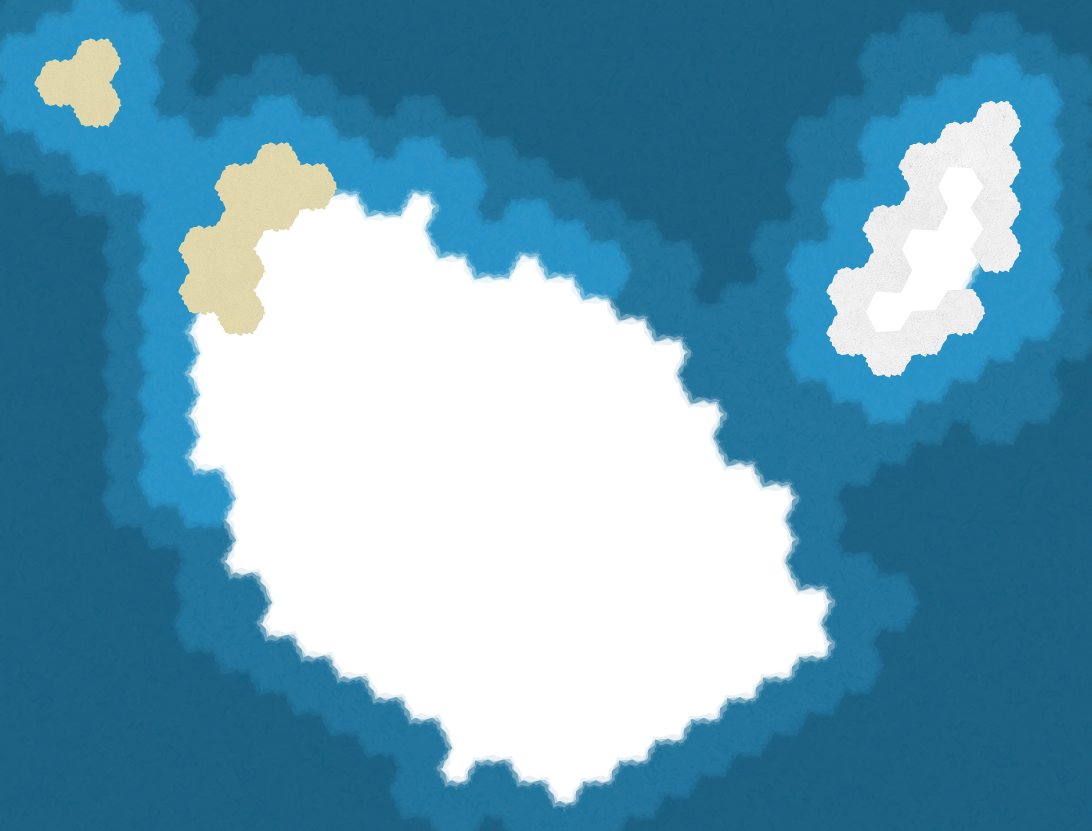
Layer system
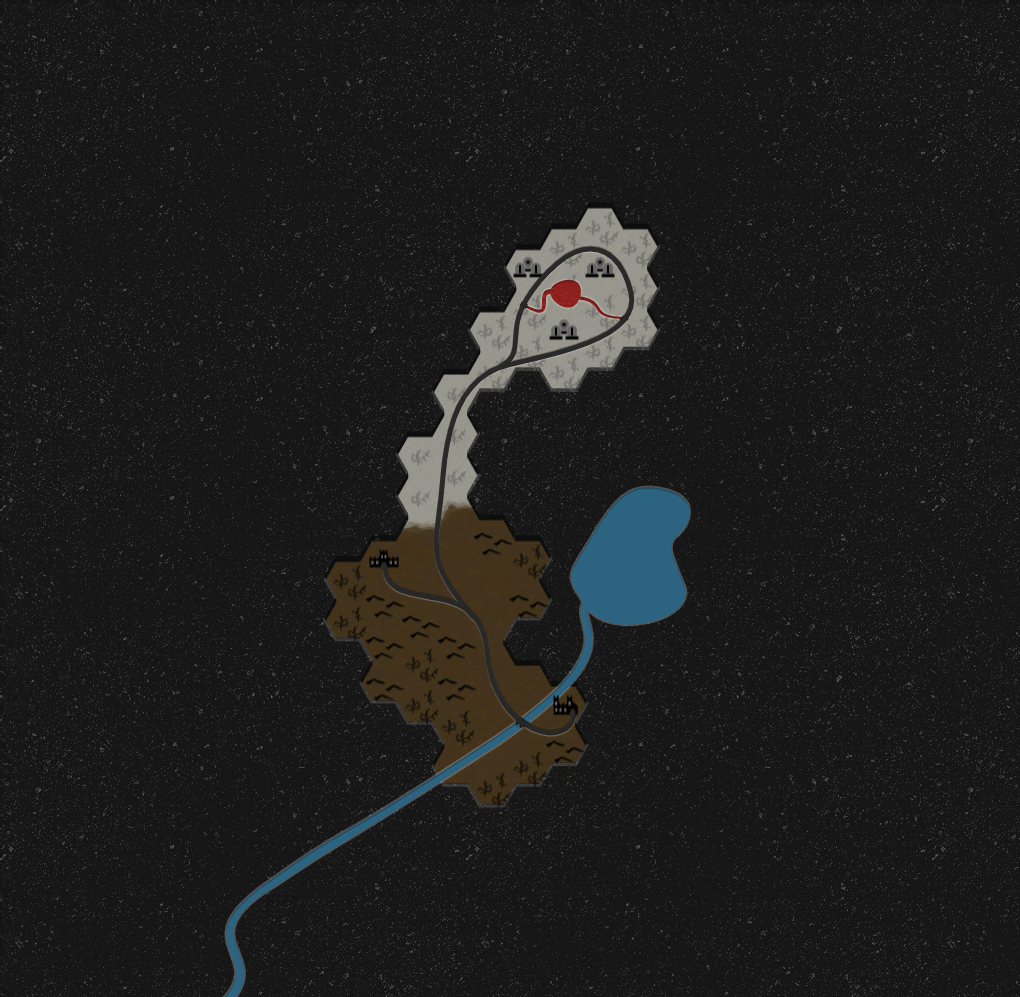
As opposed to the RPG map editor, this application does not have many layers — there are 9 of them. However, it does not mean that the editor has lost its exceptional flexibility. We are especially proud of how the method of representing height is implemented: when you transfer the texture from one layer to another one you specify that some textures should be placed above the rest of the textures. For example, you have drawn a sandy beach on the layer 0 but not far from this beach there is a high platform with a cliff and, needless to say, some crooked characters like to throw the undesirable into the water from this cliff. Now, you just need to draw a texture on the layer 1 and you will get a stylish cliff for shady dealings. It is worth mentioning that the layer 0 is the lowest one, it is a sort of a “sea level”, but do not forget about a special layer for underground maps, “the ceiling” — it is the highest layer for underground worlds.
The icon drawing system has only 2 layers placed above the textures and between these layers there is a layer for drawing curves: roads, rivers and lakes. The last layer above all of the previous layers is the text layer.
As in the RPG dungeon editor, you will be able to get a visual impression of the layer structure below.


Higher than clouds and deeper than hell
We wanted to introduce the idea of cloud islands just as we were thinking about developing this editor. What can be cooler? You have created your world where factions fight other factions, players take part in different plots and suspect nothing, then the party wanders into an old lighthouse and — just like in BioShock Infinite — a zeppelin/catapult/portal/air balloon lifts the party up into the sky and they find themselves in the world above the clouds. Who lives there, what secrets these islands or continents keep in the sky? All these questions are yet to be answered by your players!
Another scenario: the party has been sent to explore the lake where some important character recently disappeared. The party bravely sets off to explore the bottom of the lake. Of course, firstly they should drink some proper potions or equip themselves with deep-sea gear. Suddenly, one adventurer and then the whole party are swept by the undertow into some deep-water channels and in several minutes of panic they are thrown onto the shore of an underground lake where the bewildered character they have been tasked to find awaits them. As a result, the scene of the adventure changes to the depths of the underground, just like in Heroes of Might and Magic III. Is there a bunch of smugglers or even an ancient empire of some necromancers waiting for you in the depths or will you find the tunnels of long-dead dwarfs who digged deeper than was needed, as usual?
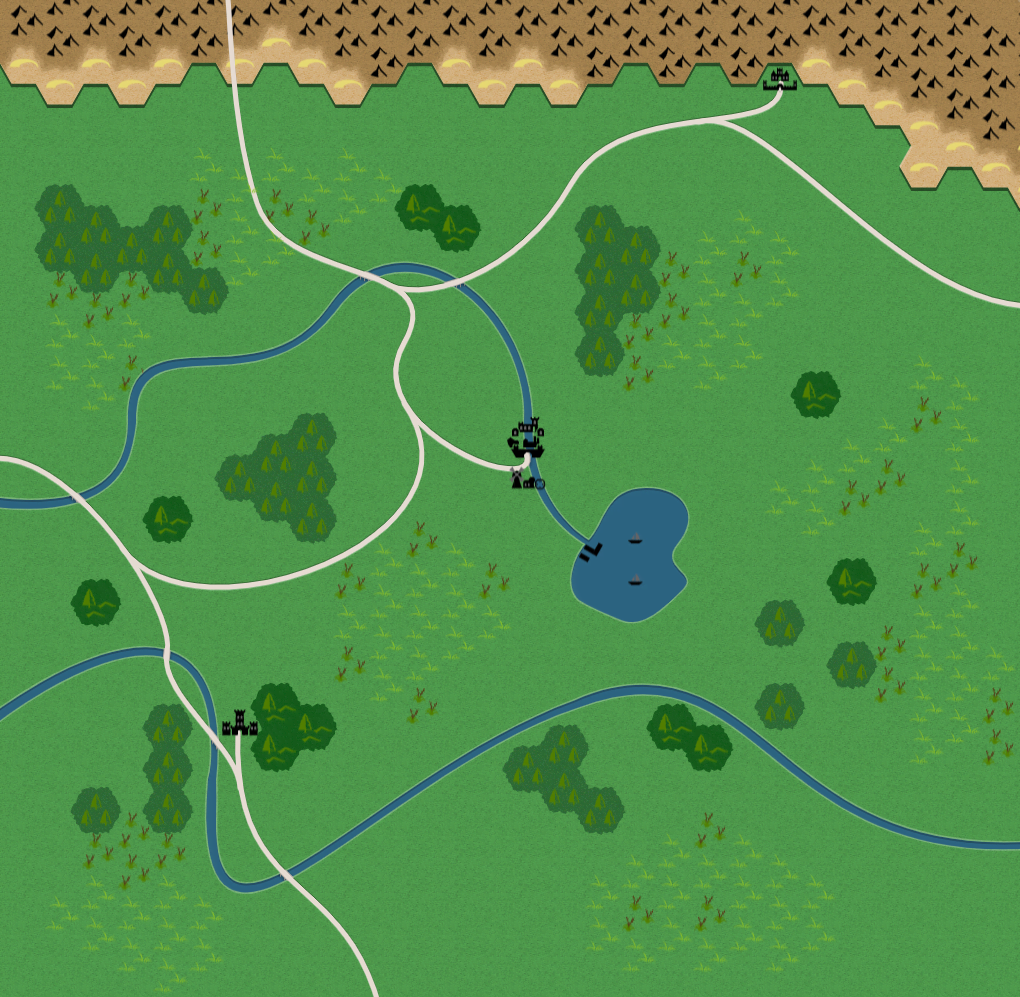
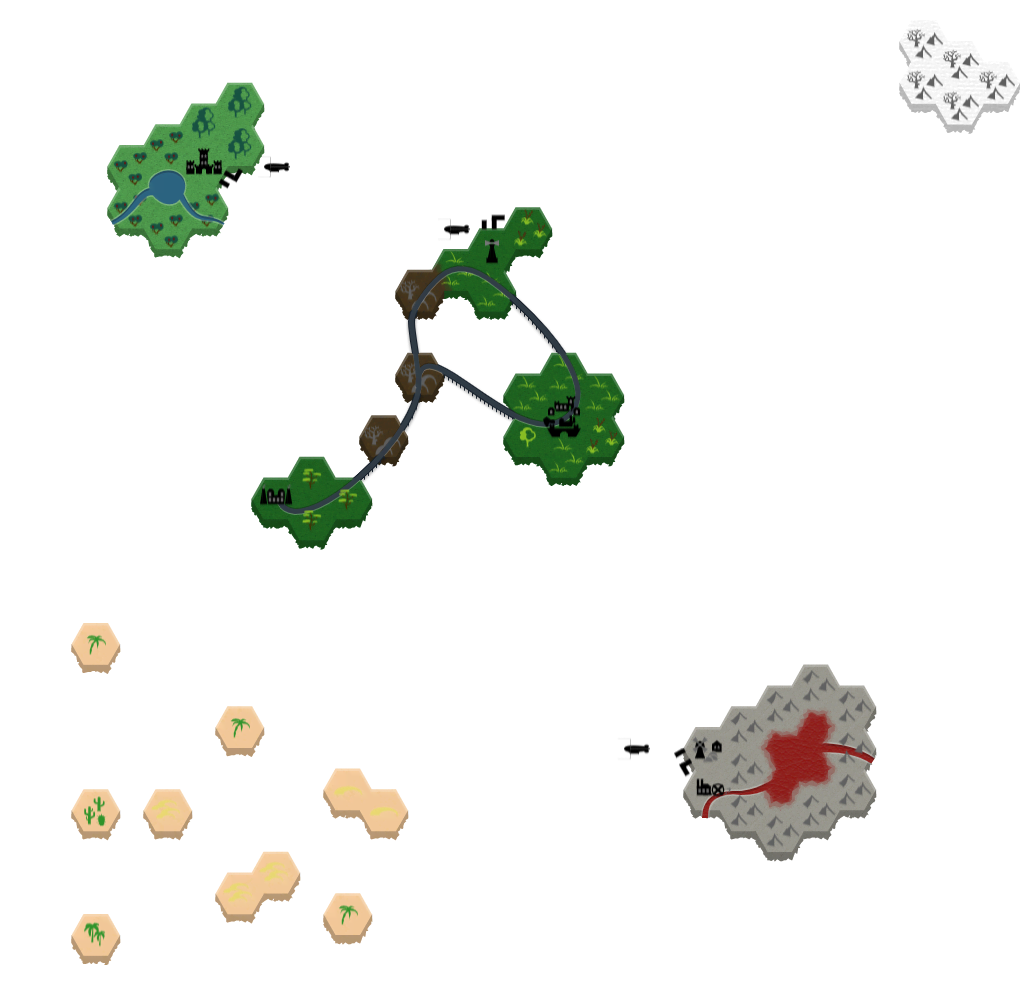
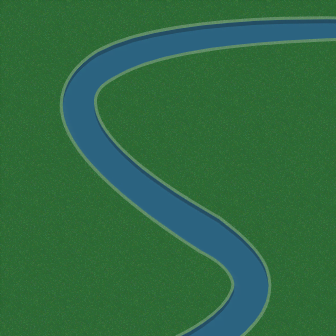
Rivers, lakes and roads

Hexes are good, of course, but if you want to draw a thin creek it is hard to do it with the help of hexes. In some editors roads and rivers are represented as special tiles which may be placed on the map. As we know it, it is not the most convenient option.
To resolve issues associated with rivers, roads and lakes we developed a special approach: rivers seamlessly flow into the seas and outflow from the lakes as long as you use identical textures for rivers, lakes and seas. When adding rivers, you will notice that canals are caved in the ground automatically and rivers smoothly flow into the seas on the shore lines. Lakes follow the same rules but they have a closed contour.
A separate point concerns roads. Do not forget that road styles may be created with the help of the road editor. A special challenge is represented by bridges. We thought that bridges in the form of sprites are not the most suitable solution because we want to make maps quickly. A bridge may often have an intricate curve and no sprites will help you to consider all variants. “Perhaps, I can use an RPG icon editor to draw the required bridge”, — this is also not the most rational option since it is time-consuming and you will have to adjust the icon in accordance with the current map features, make copies of the icon and so on. Taking all of this into account, we have found a simple way out — let the system automatically draw the bridge right under the road and only above water and rivers. Do not ask how we have managed to do it — “It just works” as one classic of the gaming industry used to say.
Conclusion
This is the end of the Hex Map Editor description. We hope you will be able to carry out your plans using our program. Don’t forget that to generate missing textures you may use a special editor; if the text color schemes do not work for you you may create them. Texture transitions may be created in a special transition editor. Of course, do not forget to share your ideas with us in our project Discord!