Texture transition editor
Suppose you`ve drawn your dungeon map, and everything seems to be fine — you have the ground, the road towards the cave of the dead necromancer is paved with tiles, and there`s some grass illuminated by light from an unknown source... but something still feels not right. The thing is that all the textures are made as painted hexes and because of that all the magic is gone — there is no feeling that the tiles are placed on top of the ground or the grass is rising above the stones. Why so? Because there is no transition from one surface to another and your eye can`t tell which surface material is higher and which is lower.
Another example: you have created an archipelago of pirate islands with our hex map editor, but again, as with many other hex map editors, the textures are simply fitted into hexes so there are no coasts or beaches that go neatly under the water surface.
With the texture blendings editor, you can create any kind of pattern for blending textures — no need to create a whole array of tiles and program the logic of their placement. Just create a blending pattern and use it wherever you like — on the battle map or on the global map of your world!
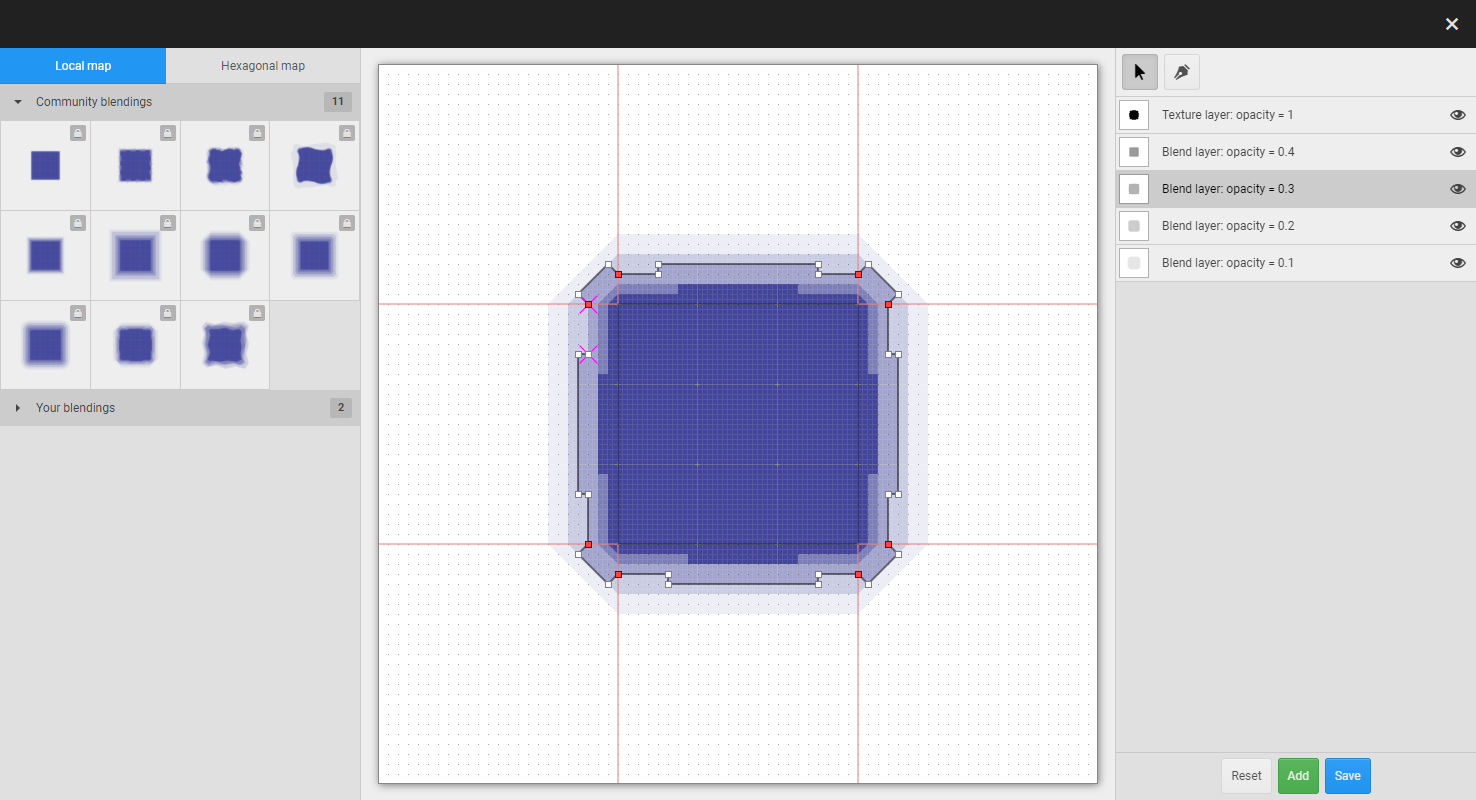
Editor Description
The blending editor is an overlay application that is always at hand, so you can add and edit texture blendings while creating maps. All changes will be applied to the current and all your maps at once.
We have tried to make the editor as simple and intuitive as possible and, as with the texture editor, it has the familiar layout of left panel, central canvas and right panel.
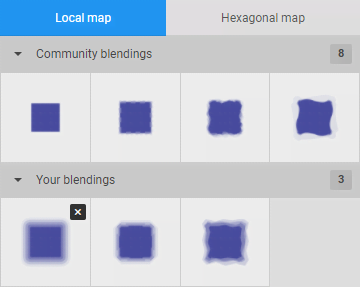
Left panel — this is where all the available blendings are displayed. The panel is divided into 2 sections: blendings for the RPG map editor and blendings for the hex editor. The reason is that we cannot use square blendings on a hex map and vice versa. Therefore we made two modes for the editor, each of which is activated using tabs in the left panel.
- Editing
- you can select any blending, but you can only edit your personal ones; this however does not prevent you from creating copies of blendings that are available as public or by subscription.
- Deleting
- your blendings have a delete button which, if double-clicked, will remove the pattern; please note that if you delete a blending, you will also remove all surfaces from the maps where the pattern is applied.
- Sorting
- ordering is only available for personal blendings: simply click and drag the image icons to change the order. All changes are applied immediately in the hex editor interface and in the RPG map editor interface.
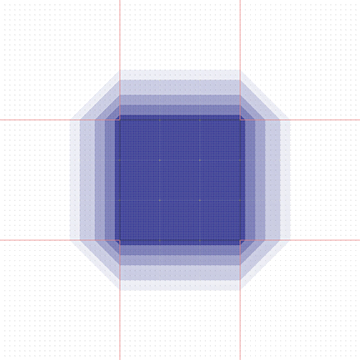
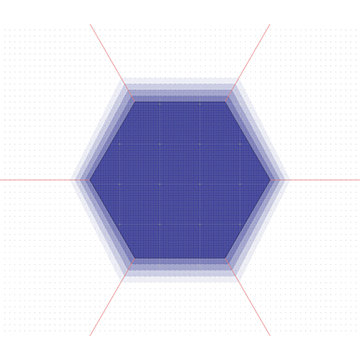
Central canvas — unlike the texture editor, road editor, object editor and others, the blending editor has an interactive canvas that you will use to create blending patterns. This is where you will be able to select layers and draw curves using line manipulators and anchor points.
Depending on the mode you select, the central canvas changes its configuration:
- Local map
- the canvas displays a grid of 3x3 squares; each square represents one cell in the adventure map editor. So a blending can take up to three squares. Each dot represents 1 pixel on the final map; since the map is made of squares of 24x24 pixels, so in the texture blending editing application there are 24x24 dots inside each square.
- Hex Map
- unlike the RPG map mode, the hex mode is less straightforward. You will only see a single hex in the centre and adjacent hexes will be shown as halves only. This is done to make the blendings to adjacent hexes possible. Because the hex is fitted into a rectangle, we cannot overlay coordinate points on the pixels in the hex map editor.
On the central canvas there are 5 layers for each mode, with fixed levels of transparency; clicking on a layer will activate the editing mode for that layer.
It is worth noting the red guide lines. Below we will describe the class of curve points, which can on-ly move along these lines.
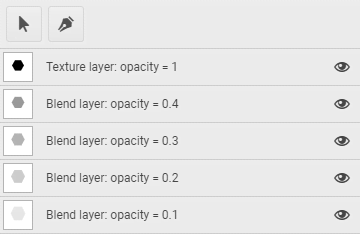
Right panel — this is where you configure the blending. The panel is divided into 3 sections: mouse modes, layer list and footer.
- Mouse modes
- since for creating blendings we had to implement curve system, which is used to create roads, rivers, lakes and text in the hexagonal map editor, here we also need two curve control modes: selection mode and modification mode.
In selection mode you can select lines and points, and in modification mode you can add new points and delete curves or lines.
Please note that when the curve editor is activated, additional controls are displayed in the mouse con-trol area.
- Layer list
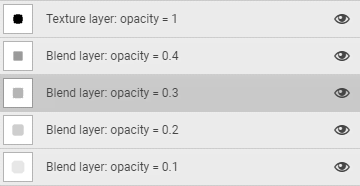
- this list contains five fixed layers, each with a fixed level of opacity, where "1.0" indicates completely non-transparent layer, and lower values indicate how transparent the layer is.
Each layer has an icon which shows what that particular layer looks like so you can see it outside the context of the other layers.
To hide layers click on the hide/publish layer icon; opaque layers cannot be hidden, they will always be visible on the map.
Layers cannot be re-ordered, their order is fixed.
If you click on the name of the layer, you will activate edit mode for that element; to deselect the layer, click again on the selected layer in the right panel. It is also worth noting that when you hover over the layer while not in edit mode, this layer will be highlighted on the central canvas; of course, hidden layers will not be highlighted.

Editing curves
Selecting a layer in the left panel or clicking on a layer directly on the central canvas will bring you into layer editing mode.
Layer editing is based on the curve editing system, but unlike the RPG map editor, here the curves are composite, i.e. the curves can be made up of an unlimited number of segments, so additional functions will be available.
In contrast to hexagonal map editor, in the blending editor curves are initially created with anchor points on them. Therefore, we can edit only existing curves, but this does not limit our editing options in any way. Once you have selected a layer, you will have two tools available.

- Selection mode
- in this mode you can select curve points as well as curves. To select a point, just click on one of the square dots, and to select a curve, move the cursor over the curve and you will see an assistant line that you can click on.
- Modify mode
- to add points simply click on the canvas and the point will be added to the end of the curve. Or you can hover the cursor over a particular segment of the curve and click — a point will be added to the curve and placed so that the shape of the curve is kept unchanged.
- Deleting curves
- unlike in the RPG map editor and the hex map editor, there is no separate button for deleting curves in the current application. To delete a curve, simply switch to Modify mode and right-click on any curve you wish to delete.

- Linking curves
- after selecting a specific point that links two parts of the curve, you will see a chain: when it is active, the anchor points related to this point will be linked, so you can make smooth blendings from one curve to another.

- While editing a curve, the baseline will be marked in a special colour on the central canvas of the blending editor and you can change the curve drawing mode to : straight line, quadratic curve и cubic curve.
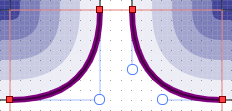
If you select a quadratic curve you will have one handle available to help you shape the selected curve.
If you select a cubic curve there will be two handles connected to their anchor points.
The curve has two types of controls:
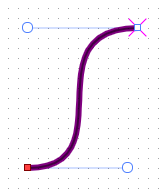
- Control point
- looks like a square; if the square has diagonal lines it means that the point is either the start or the end of the curve. To change the position of the points, just click and drag the them. Note that if you join the beginning and the end of a curve, you will close the contour. If the contour is not closed, the editor automatically draws a line from the end point to the starting point, thus closing the shape.
- Curvature manipulator
- if you select quadratic or cubic curve mode, there will be handles that are linked to parent anchor points. By moving the anchor points, you will change the tangent lines of the Bézier curves and thus modify the curvature.
Reference lines and anchor points
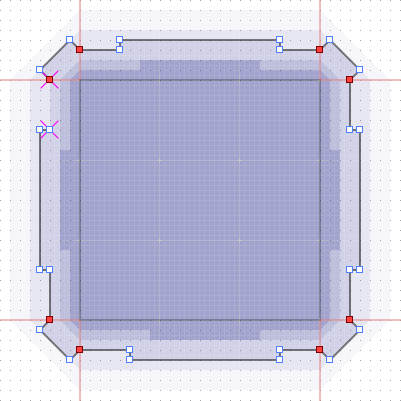
The blending editor requires reference lines along which fixed anchor points will move. This is done to eliminate the chance of creating a blending of irregular shape, because it will be inconvenient if for some reason a square in the RPG map editor will not have a centre, or a hex in the hexagonal map editor will be missing a part.
In the first iteration of this app there were no reference lines and points, and we encountered various oddities when creating blendings.
- Reference line
- is a red ray coming from the vertices of the currently selected shape. You will have 8 reference lines for a square and 6 for a hex. Only anchor points move along the reference lines.
- Anchor point
- is a special non-removable point that only moves along the reference lines. For the local map editor there are 8 reference points, but for the hex RPG editor there are only 6. These points cannot be delet-ed or added, but no one prevents us from changing the curves that are based on them. With these points, we always keep the shape correct, whether it is a hexagon or a square.
Conclusion
The texture blending editor may not be the most important program in our cloud ecosystem, but it can be quite useful in some cases. We have spent a fair amount of time developing it. We hope that it will prove useful in developing your hex maps or adventure maps for your teams.
