Texture editor
Textures are an integral part of the hex map editor, because unlike the battle map editor, the hex editor has no tools for painting over surfaces other than textures. Using textures you can create land, seas or even clouds. There are often quite a few different textures available in other applications, but, as it al-ways happens, the texture you want isn`t there. Typically, you might want to take `this one` texture and change its colour, but what if you lack knowledge of Photoshop or other image editing software? In that case, our texture editor will be able to help you.
Suppose you have a texture that just needs a colour correction, in this case all you need to do is to up-load it to our server and perform the colour correction with the help of our filters. When you upload a texture, we will save both the original and the edited version.
If you don`t have a texture yet, you can always create your own one. Our RPG texture editor has a large library of terrain images that will help you make a texture from scratch and then use it to create maps.

Editor description
The road editor is an overlay application that is always at hand, so you can add and edit textures while creating maps. All changes will be applied to the current and all your maps at once.
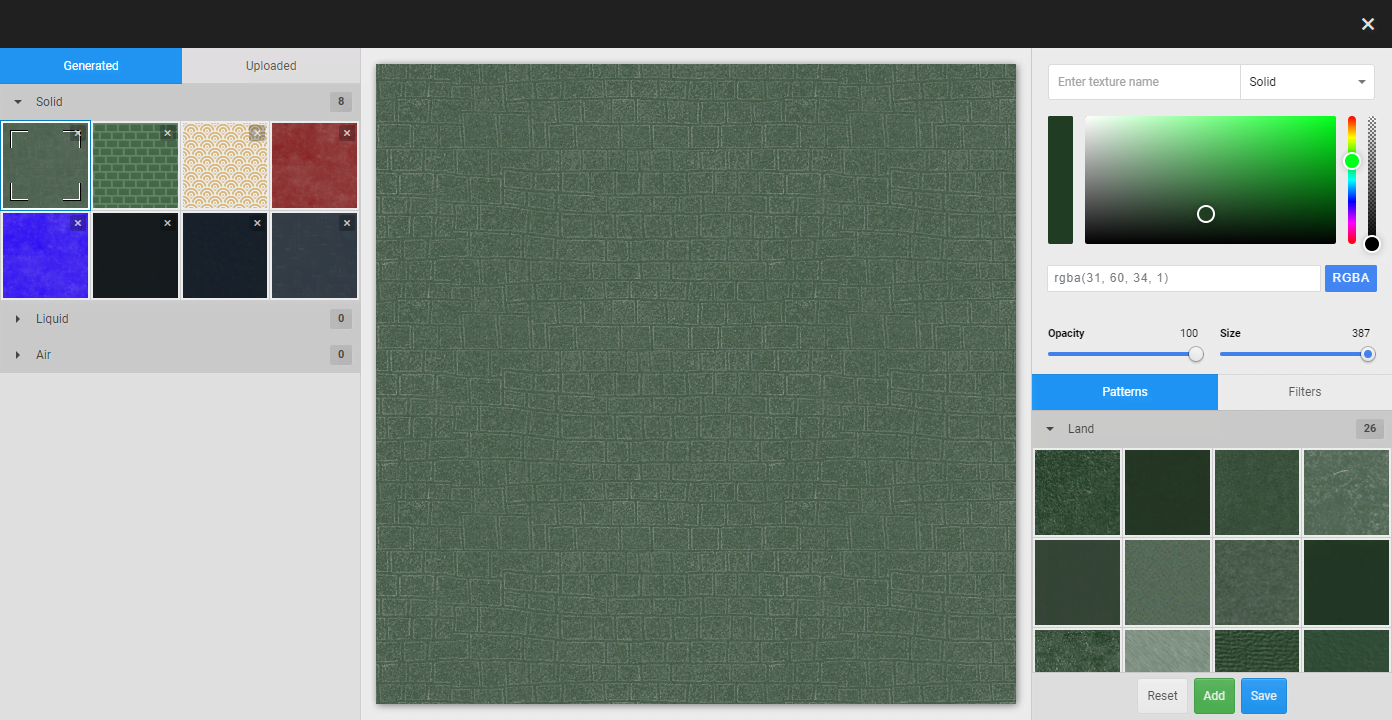
We have tried to make the editor as simple and intuitive as possible and, as with the texture transition editor, the layout of the editor is familiar: left panel, central canvas and right panel.

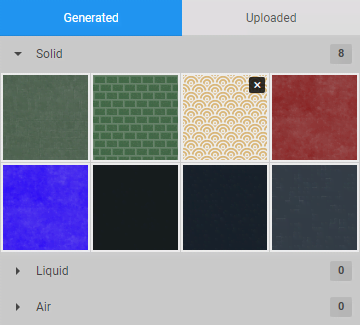
Left panel — this is where all the available textures are displayed. The panel is divided into 2 sections: Generated textures and Uploaded textures. The list of generated textures includes textures that were generated using semi-transparent relief textures. Uploaded textures are those created using the uploaded textures. The texture lists are divided into 3 categories like in the other applications: community, subscriptions, and your personal schemes.
- Editing
- while you can select any texture you want, only your personal ones can be edited, but that doesn`t stop you from creating copies of the textures that are available as community or subscription ones.
- Deleting
- your textures have a delete button which, when double-clicked, will remove the image; please note that if you delete a texture you will also remove all the surfaces from the maps where the texture is applied.
- Sorting
- ordering is only available for personal textures: just click and drag the image icons to change the or-der. All changes are applied immediately in the hex editor interface and in the map editor interface.

Central canvas — in this application the canvas is not interactive, there are no buttons or controls to work with. The canvas is only there so that you can see what the texture you are editing will look like.
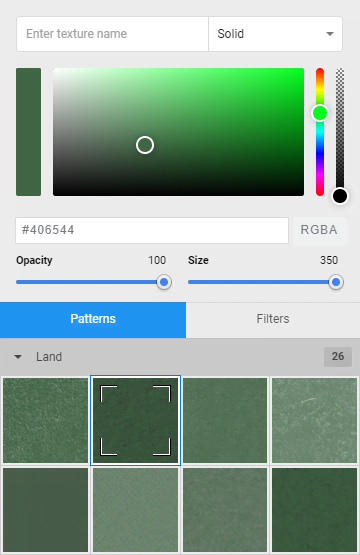
Right panel — this is where you configure the texture. The panel is divided into 5 sections: metadata, colour selection, terrain patterns, filter settings and footer.

- Metadata
- this section is for editing the name of the texture and you can also select the type of the texture — solid, liquid or air. Note that bridges are automatically built over liquids and air, which you can create in the road editor.
- Colour selection
- is always at hand, you can define a colour manually using RGBA format, choose a colour on the palette and there are colour range and transparency sliders. Also, because the system remembers the previous colour, you can always go back to it if you`re not happy with anything. Remember that you are editing the colour of the background on which the terrain template or the up-loaded image is placed.
- Opacity slider
- all terrain textures are transparent to some degree, this is done to allow you adjust the colour using the fill, because the fill will be visible through the texture. But if the texture does not seem transparent enough, you can always increase the degree of transparency. This slider also affects the transparency of the uploaded image.
- Size slider
- if you are not happy with the size of the texture that will be placed on top of the road, you can reduce its size using this slider. Sometimes artifacts can appear on roads because of texture downsizing; in that case, simply adjust the size a bit. Also this slider affects the size of uploaded image.
- Patterns list
- this list is divided into categories, and it is worth noting that it is identical to the terrain list from the road editor. Select one of the categories, click on the texture and it will be applied instantly. You cannot undo the application of a pattern — only replace it with another one. Note that patterns are only available for textures that are created from scratch; there is no such option for downloaded textures.
- Filters list
- there are 14 filters in this section. There is no point in describing each of them, just experiment — to reset to default values click on the reset button on the left side. Use the slider for adjusting or edit the number on the right manually.

Conclusion
By creating your own textures, you create unique worlds for your players. Experiment, there is no right or wrong approach. We believe that the overlay structure of our project makes it a lot easier to try out different assets on the fly rather than painfully and distressingly choose specific icons or textures from a list sold by the developers. Create, then share your opinions with us in our Discord channel!
